
Here's another way to make a 3D text with photoshop, this method is simple and yet it can have different results by changing a few things in its execution.
STEP 1:
I create a new document, 500*500 pxl, By using File-->> New (Ctrl+N).
STEP 2:
I place my text at the centre of my image (I chose a color black), By using Horizontal Type tool (T).  STEP 3:
I rasterize the layer of my text and I called it text1 by using Layer-->> Rasterize-->> Type.
STEP 4:
then I change with the prospect, By using Edit-->> Transform-->> Perspective. STEP 5:
I use filter-->> Stylize-->> Emboss with the following adjustments:Angle: 110, Height: 6, Amount: 105. 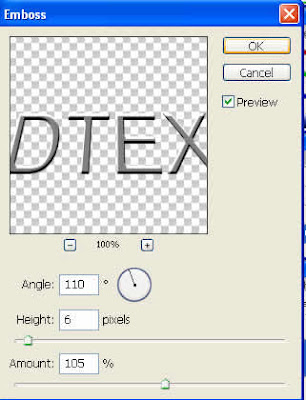 STEP 6:
I will now create my volume, for that I select my text1 layer, and then I take the tool Move (v) and I press alt while pressing the top arrow (about 26 times). STEP 7:
I merges all my by selecting all my layers thin use Layer-->> Mearge layers (Ctrl+E).
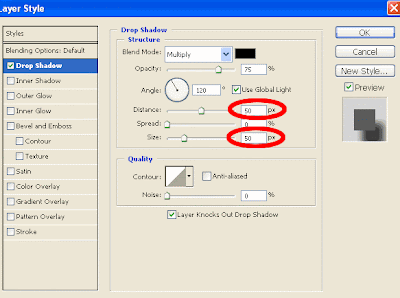
Step 8:
Add a drop shadow: distance 50 and size 50. By using Layer-->> Layer style-->> Drop shadow.
 See the final work below:


1 comments:
good tutorial!!
Post a Comment